Shine Bright Like A Marquee Light

Yeahhhhh, we've seen the marquee light letters in just about every craft store around town, but have you ever thought about making a marquee piece of art?  I did!  I'm really into pineapples these days, especially since summer is almost here, and I wanted to add a funky touch to one of my bedrooms.  I thought ah-ha!  I'll bring back one of my old school DIYs and add light art.  This is how it turned out, perfect, modern and most importantly -- FUN!

Kristen Joy - Marquee Pineapple

Let's get started!

Kristen Joy - Marquee Light Materials

Materials:

  • Foam board
  • Frame size of your choice (i used a 20 x 20 Ikea RIBBA frame)
  • Favorite wrapping paper/fabric (if you want to make a mirror with bulbs on it use metallic wrapping paper)
  • Spray adhesive
  • Ruler
  • X-acto knife
  • Outdoor patio bulb lights

Not shown:

  • Permanent marker
  • Zip ties
  • Scissors
  • Picture hanging kit 
  • Hot glue gun

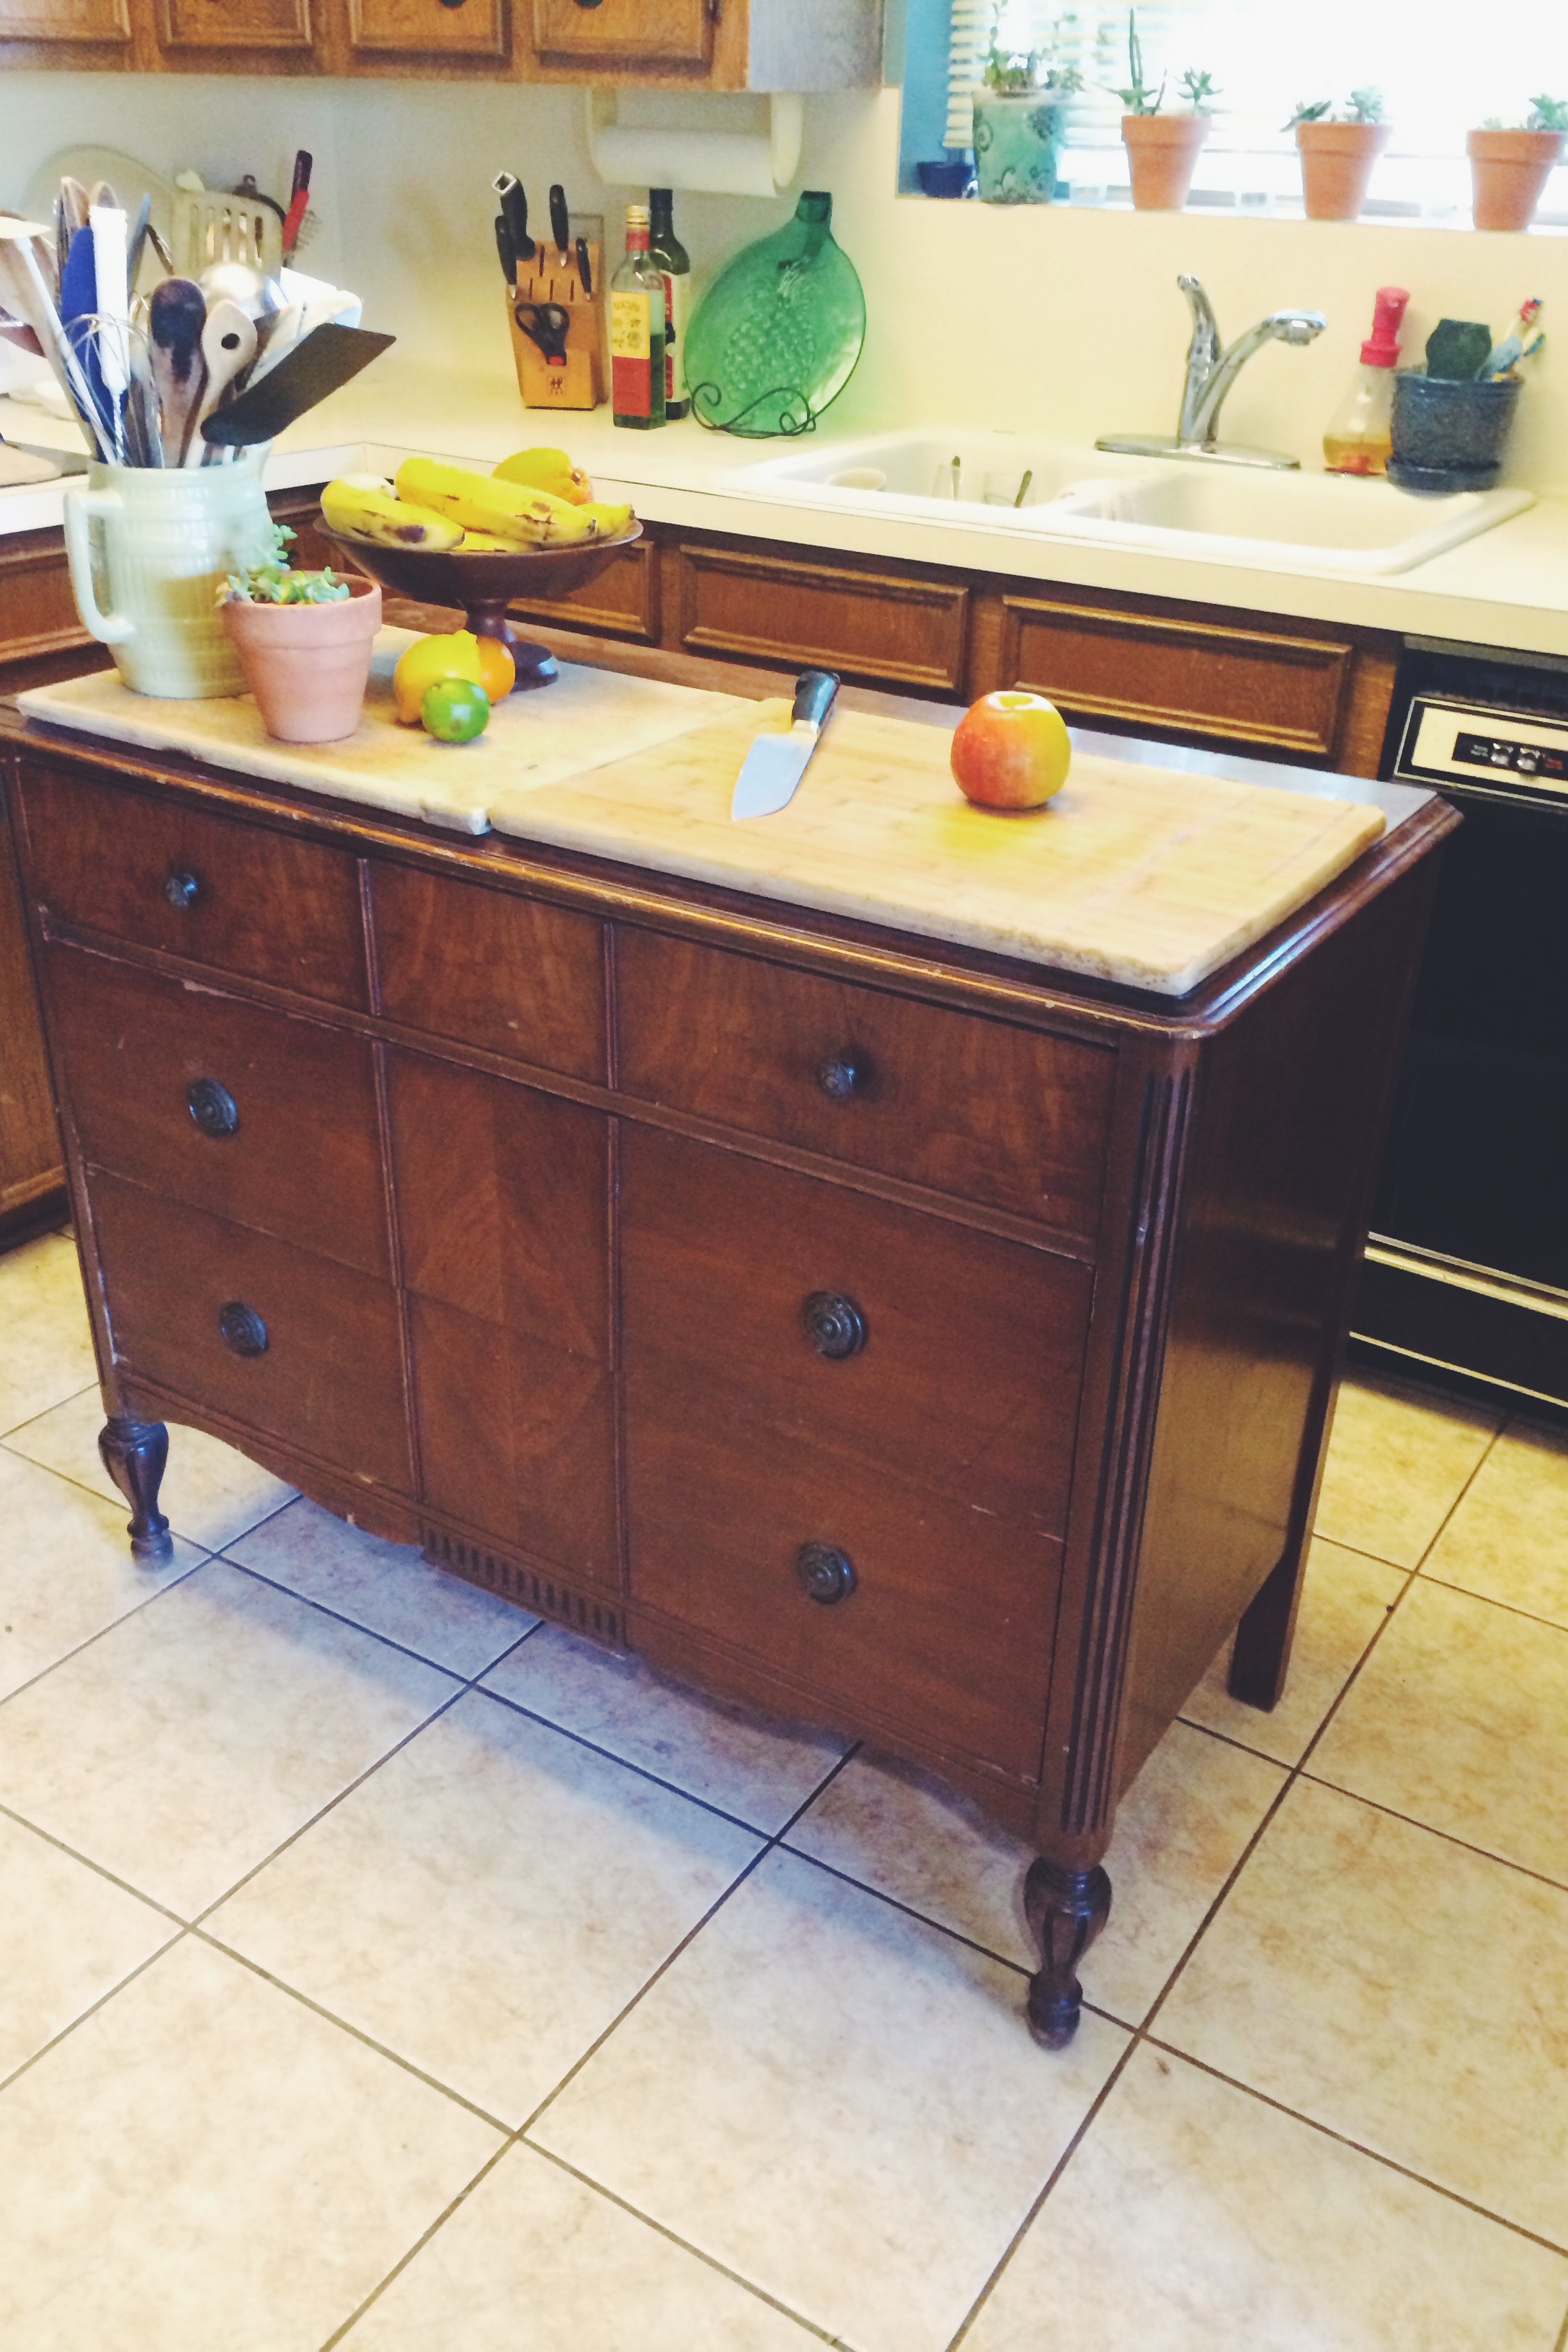
First, you'll need to measure the foam board to match the size of the glass in your frame. Simply pop the glass out and trace the glass on the foam board.  Using the X-acto knife, cut out the foam.  

Kristen Joy - Marquee Materials 3

 If this is a re-purposed frame, you can measure the inside of the back of the frame (see photo), and then measure, trace and cut the foam.

Kristen Joy - Marquee Light 1

Now, it's time to insert the foam board into the frame to make sure it fits.  If not, NOW is the time to fix it!  DIYs don't always go as planned, but luckily most of the time there's an easy fix available.  

Kristen Joy - Marquee Materials 2

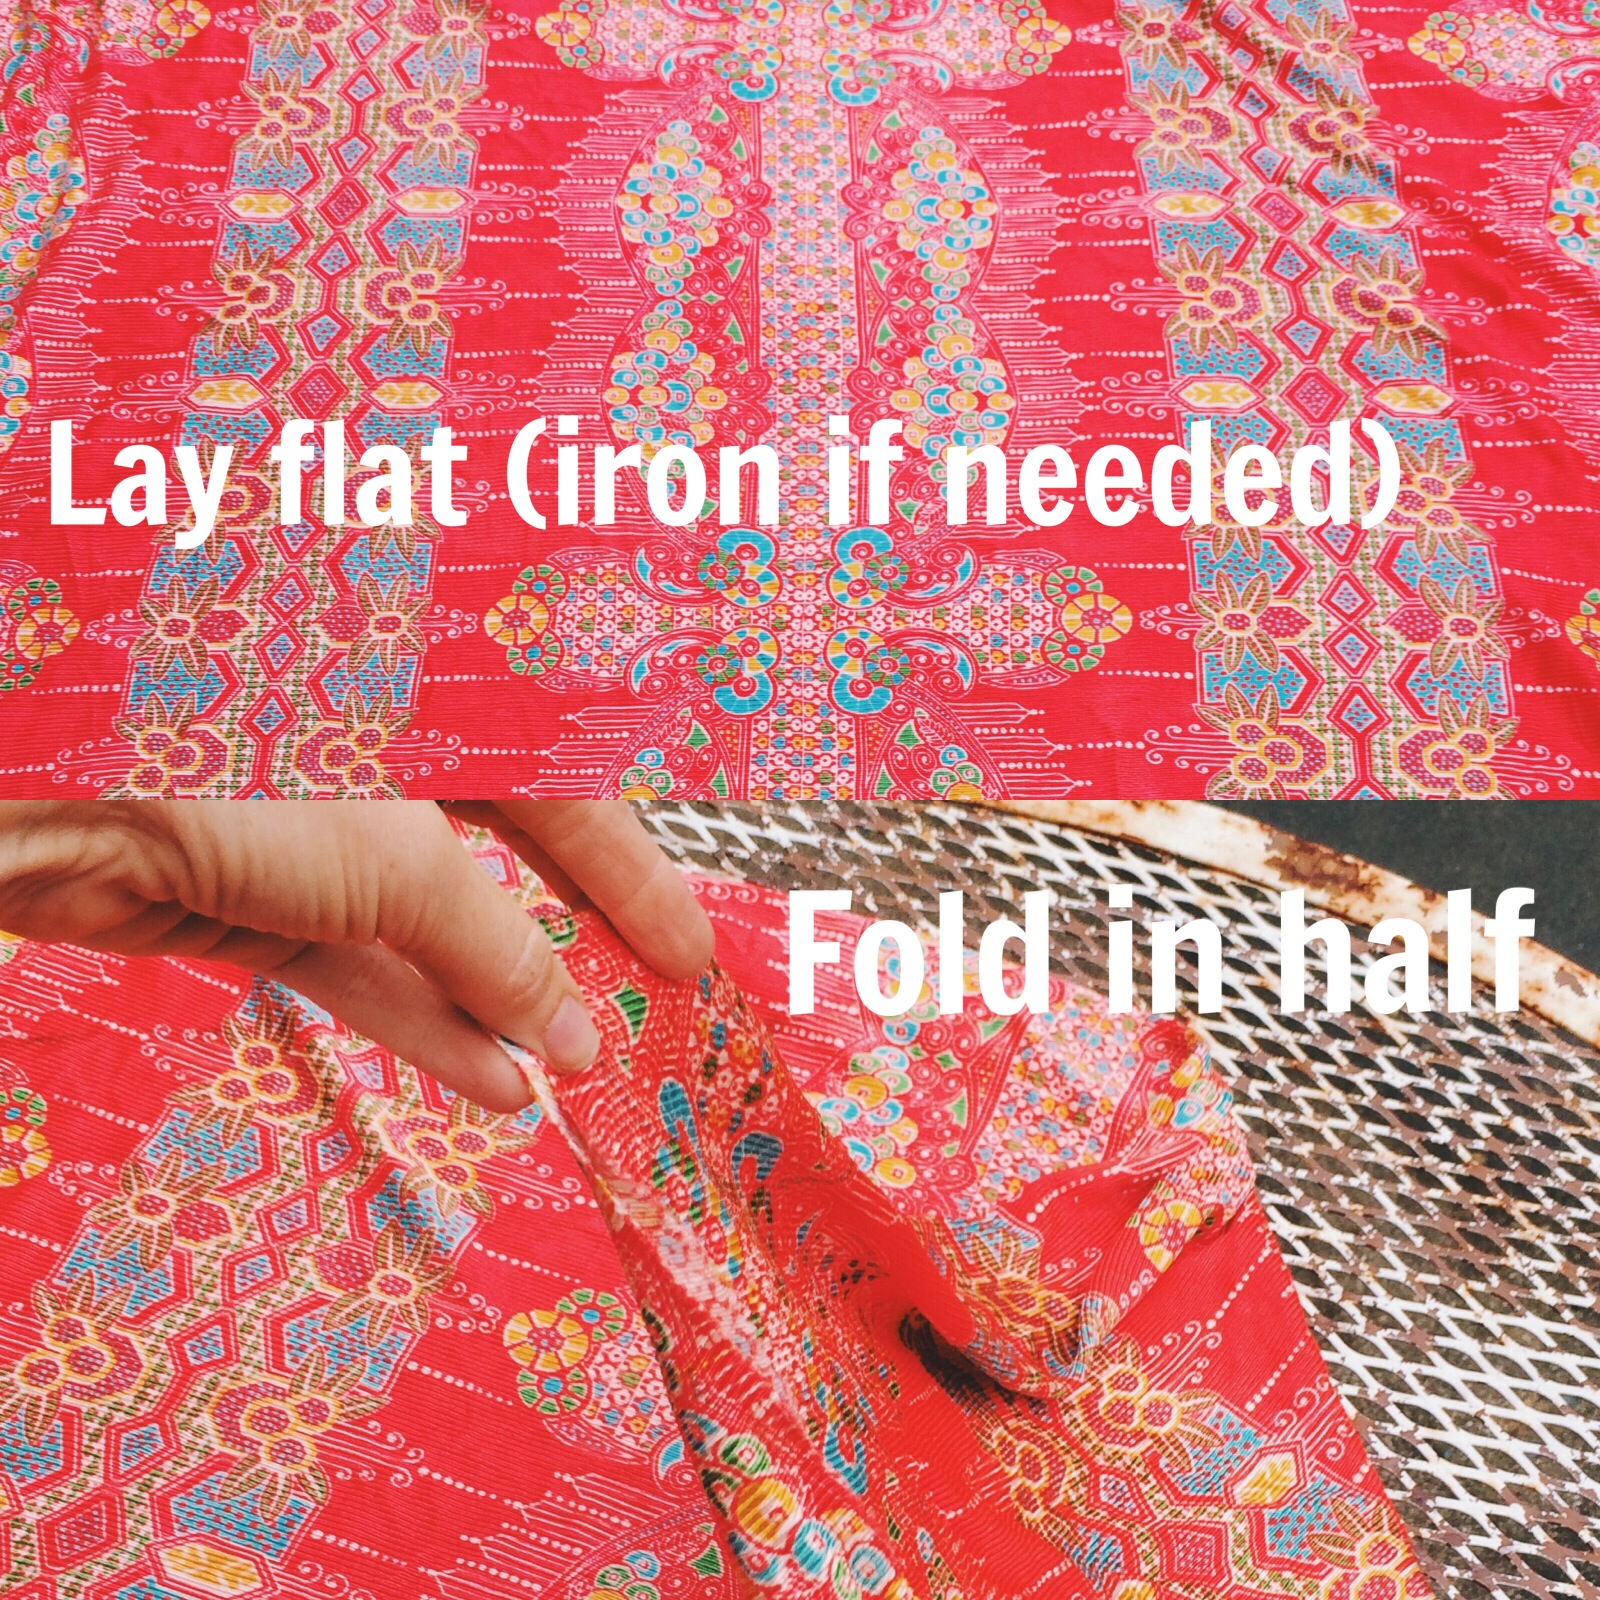
If the foam fits, it's time to give it a wrapping paper face lift (no botox required, unless you know where I can get some... but that's for another blog)!  Roll out your wrapping paper, and then lay the board on top of the wrapping paper, making sure to leave a little extra on each side -- just like when you're picking out what pants you'll wear for Thanksgiving, you never know if things are going to fit!

Kristen Joy - Marquee Materials 4

Now it's time to bust out that adhesive spray, I recommend Elmer's Glue brand.  Make sure that your floor is properly protected, or opt to do this outdoors.  Spray one side of the board with the adhesive.  Then carefully lay your piece of wrapping paper on the board, smoothing it out on all sides.  Cut off any extra paper.  

Kristen Joy - Marquee Materials 5

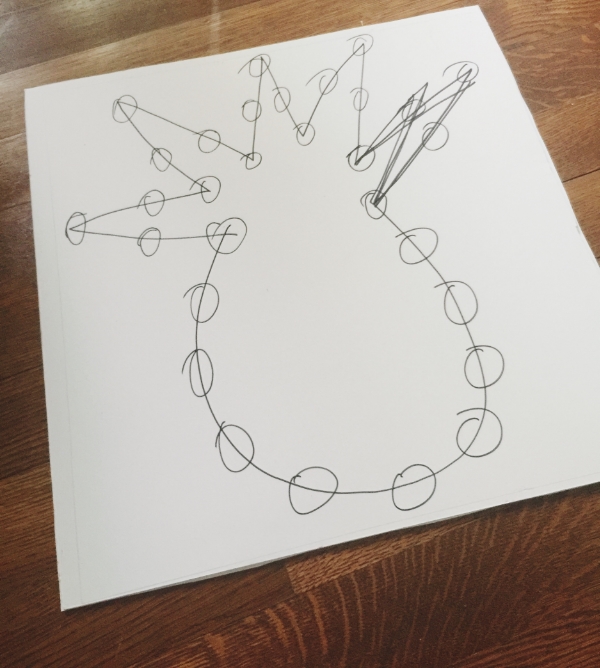
On the back of the board create your image.  If you're like me it's chicken scratch...keepin' it real. 

Kristen Joy - Marquee Materials 5

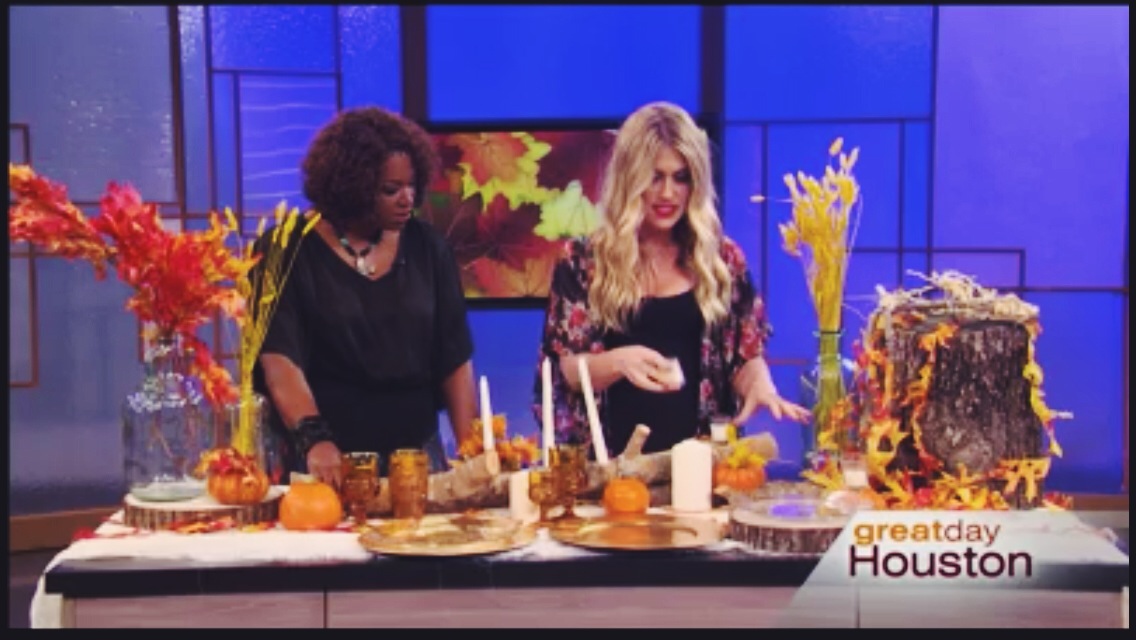
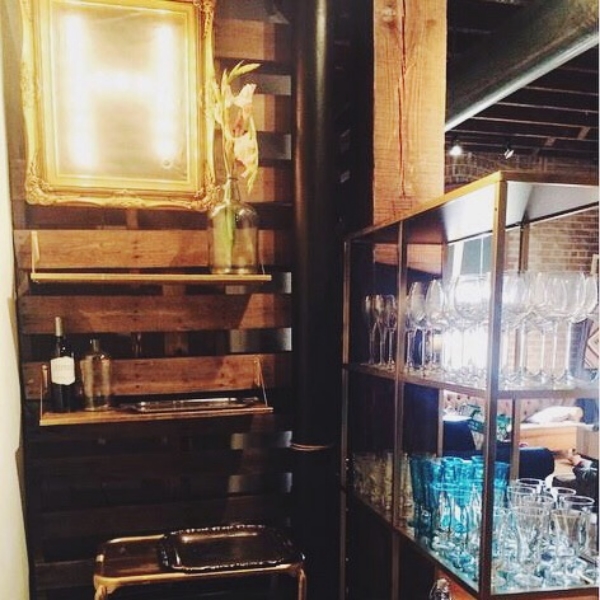
Here is the heart marquee I did for a past segment on Great Day Houston. I've also done a letter H for my last name, and it was the perfect addition to the bar in my old apartment.

Great Day heart marquee
Letter H marquee

This time I want to put an aloha spin on the bedroom -- hence the pineapple.  

Once you've drawn out your image with a permanent marker, it's time to cut!  Make 3 cuts in the shape of an asterik, a little bigger than the size of a quarter.  

Kristen Joy - Marquee Materials 6

  Then, take your permanent marker or anything else you might have handy to pre-punch through the holes.  After you've done this, make sure to cut away any extra foam that might be in your way.  

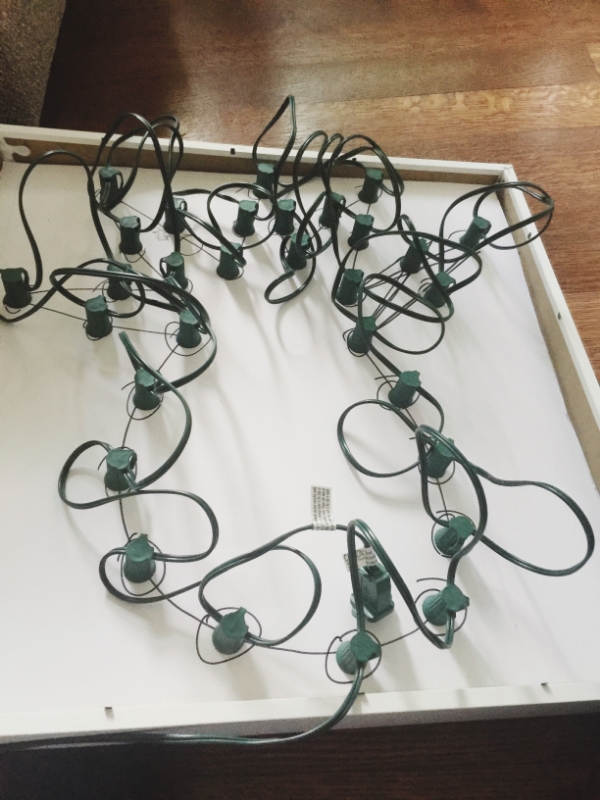
Now it's time to assemble to lights!  Start from the bottom with the male end.  Carefully place the lights through the holes.  

Kristen Joy - Marquee Materials 7

As you work your way around to the female end make sure that the lights are evenly spaced.  Once you are finished, take a zip tie, gather any excess lights and secure them.  

Kristen Joy - Marquee Materials 8

Grab your frame and carefully insert the foam board.  Get out that glue gun and apply a thin layer of glue around the inner perimeter.  Think of the caulking in your bathtub, you want the foam to stick to the frame -- like birds of a feather flock together, like peanut butter on the roof of your mouth, it needs to STICK!

Kristen Joy - Marquee Materials 9

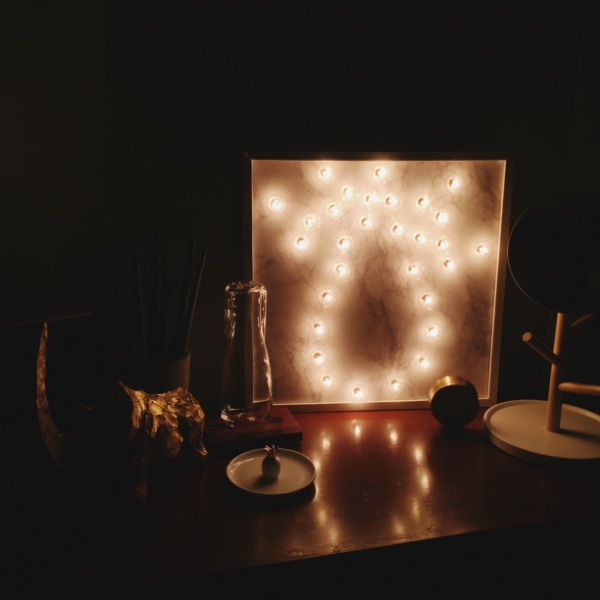
Now it's time to showcase your work!  No matter where you put this marquee light art piece, it will always be a show stopper.  

Kristen Joy - Marquee Light Final Product

"Shine bright like a diamond..."

xo, 

Kjoy


In the mood to Repurpose?

So much fun to be had....

So much fun to be had....

So have you ever come across an old sweatshirt you never use, or extra lightbulbs above the washing machine or how about empty wine bottles that are just to memorable to throw away? Well, check out my GREAT DAY HOUSTON segment where I show "out of the box" ways to repurpose what's already inside your house.  Fun times!!! ...am i right?! 

Click on link below to watch Repurposing my segment. 

REPURPOSING WITH KRISTEN ON GDH


Before you click grab a snack. It can be like we're hanging out together. 

Before you click grab a snack. It can be like we're hanging out together. 

I hope you enjoyed your treat and discovering new ways to DIY. Until next time...

xo, 

Kjoy

Fall in love with DIY

So I'm late the game in posting this segment but here is the thing...you can alway take the info in segment and jazz up any holiday or season. Its all about taking what you have and repurposing it for different scenarios. I love bringing the outside in and in this Great Day Houston segment I did just that. Click on link below to watch.

FALLING IN LOVE WITH DIY segment on GREAT DAY HOUSTON

Best wishes in falling in love with DIY....i'm completely smitten so i totally get it if you do. 

Much love, 

Kjoy

gifts. gifts. and more gifts.

Have you ever forgot about a last minute party, suddenly remember a birthday or you look at the calendar and its teacher appreciation day???... and you freak out because you have no gift to celebrate? Yeah me too. life story really. Below is my latest Great Day Segment on gift tips to ease the pressure and a bring some sanity to those freak out moments.

RIght before i go on the lovely heather is "mic"ing me up.

RIght before i go on the lovely heather is "mic"ing me up.

If video is not working click link below 

Gifts. Gifts & More Gifts GDH Segment

Terrarium what?! Love. 

  • Wine goblet
  • Rocks
  • Potted plant

Place rocks in the bottom of glass. (this helps with the draining of water, succulents will die if they have too much water)

Place soil and plant in cup.

Top off with rocks.

So stinking awesome.  Its a great teacher's gift and you can tag with a sweet note that says, "thank you for helping me grow." ahhh.

coastergift.jpg

Personalized Coasters

  • Tiles ($.13 ec at Home Depot)
  • Mod Podge
  • Photos (I cut them 4x4)
coastersteps.jpg

Lay out tiles.  

Swipe a thin layer of Mod Podge on tile and place pic on tile.

Let it get tacky.

Then on top of photo (swipe in same direction) a thin layer of mod podge. Let it dry.

Add two more coats of Mod Podge.

Aren't they just preciousness?!

Aren't they just preciousness?!

Personalized water colored journal.

  • Watercolor canvas
  • Paper
  • Ribbon 
  • .05 thin marker
  • Watercolors
diary3.jpg

Cut canvas paper to the size of journal you want.

Cut filler paper (blank, lined or graph paper) a little shorter all around to fit inside canvas.

Fold both in half.

Lay canvas open and place ribbon on the inside directly in the top middle. 

Lay paper down on top of ribbon and canvas. 

Sew one seam directly in center of booklet.

Write out personalized message on canvas.

Dear Diary, ... Love, Maddie

This is going to be your year...2014

This is where dreams begin...

Now paint.

Maddie is going to get deep like her aunt Kiki.

Maddie is going to get deep like her aunt Kiki.

fortkit2.jpg

Fort Kit

  • Sheet (i tied an old sheet)
  • Rope
  • Twine
  • Hooks
  • Pens 
  • Clips
  • Flashlight 
  • Glowsticks
fortkit.jpg

Throw it in a bag, tag it and go! Easy!

I actually sewed a piece of piece of burlap up the sides to make a bag. It took about one minute. 

Personalized Plates full of treats.

  • Dollar store salad plates
  • Permanent Markers
  • Cookies :)

Set oven at 350 degrees.

Scribble on plate. 

Place plate in oven for 30-40 minutes and then let it cool.

Bake some yummy cookies.

The art work should set and you have a perfect personalized gift for a teacher, mentor or friend.

My friend and producer Erin.

My friend and producer Erin.

I just want to give a shout out to one amazing producer and now friend Erin. She not only produces amazing segments on Great Day Houston but always makes me feel so special when I come into studio. Erin wherever my life and journey takes me on my road to my own Talk Show I hope that I find you by my side. You are AWESOME.

xo,

kjoy


Beachin' it up

beachheader.jpg

In the words of Will Smith

It's Summer, Summer, Summertime...

Want to keep the sand at bay? Want to have skin that glows for days? Want to sleep on the sand like its you on personal bed? Want to find the man of your dreams?...ok i can't help you with the last one but I got the other stuff covered on my latest segment on Great Day Houston. 

If for some reason the video will not play, click on link below to go to Great Day Houston Segment.

BEACHIN' IT UP SEGMENT

Watch till the end where I give a ridiculous answer to her question...however "in my head"  i had a good reason for it. ;)

Watch till the end where I give a ridiculous answer to her question...however "in my head"  i had a good reason for it. ;)

Prep yourself with a homemade scrub. 

I have actually used this and it does wonders. I couldn't stop touching my legs, they were like butter.

scrubadubdub.jpg

Ingredients

  • 1 lemon
  • 2 1/2 cups of organic sugar
  • 1/2 cup of melted coconut oil or olive oil

Throw it all in a cute mason car or repurpose a jelly jar.

When bathing lightly dampen skin and massage a scoop of scrub on skin.

Scrub a dub dub for a least a min to exfoliate skin.

Then grab your razor and with mixture still dispersed on skin, shave. You are going to take away dead skin. (gross sounding but works like a dream)

Repeat another round of the scrub a dub dub and shave again.

Your legs should be as smooth as a cutie pie baby's booty.

Comfy and Cozy

Ingredients

  • zippy locks
  • stuffing from a pillow
  • hand towel
  • bath/or beach towel
  • thread and needle
stuffing.jpg

Grab a gallon size zippy lock or larger and stuff with an old pillow or the stuffing from it.

Using the a zippy lock bag will make your pillow water resistant from your sweat and the ocean drizzle.

pillowtalkonthebeach.jpg

Grab your bath towel and hand towel and fold hand towel in half.

Sew one side of the hand towel leaving a 1/2" at bottom by seam.

Attach the hand towel to the edge of bath towel and sew along seam connecting the two together.

Make sure to leave an opening on the other side to insert your plastic covered pillow. (This is also great because you can remove pillow to wash your towel after you "stinky it up" at the beach. :)

towel talk.jpg

Cool yourself.

Ingredients

  • 2 to 3 green tea bags
  • hot water
  • empty spray bottle
tea time.jpg

Boil tea bags, let it steep and then when cooled poured into bottle and refridgerate. 

Not only does this feel good on a hot summer day but the antioxidants in the green tea are amazing for your skin. #winning

For more skin benefits check out HERE.

Additional Tips

To add color to your skin put away the makeup and grab a facial tanner with spf.  My favorite is Josie Maran.

Make a tent. 

Its a place to cool down if you're getting too much sun.

Its a cool place to keep drinks from melting and food from wilting.

Its a great visual for photo ops.

Use sheets to lay on. 

Cotton sheets are breathable and cover a large area.

Bring sandwich zippy locks to make sand bags to hold down sheet from the wind. It works wonders. 

Frozen water bottles to add to the ice. 

They will keep things color for longer and when they begin to melt you can enjoy on the ride home from the beach.

Ok enough tips already...

Get yourself to the beach. Take in the fresh air. Get mesmerized by the ocean waves. Fill up with the light of the sun.

Salt in the air and Sand in your hair... Hello Summer! 

See you babes at the beach. 

xo,

kjoy


Peace, Love and Boho

At 5:45am this morning, the rain was pouring and my mind was paranoid that my alarm wouldn't go off and I would be late for the live taping of Great Day Houston. (I set 4 alarms just in case:) Needless to say I slowly pried my eyes open, thanked God for the day and began the horrible habit of the social media scroll.  

After 10 minutes passed, I peel myself from my warm cozy bed and headed to kitchen to get my daily dose of Spark. Feeling a little more alive I began my beauty regimen; hair, makeup, lashes, making the ever changing decision on what I am going to wear while downing a couple cups of coffee. Ready a little early...(WOOHOO)...I head out in the rain and get on the road. 

Jammin to the radio with about 20 minutes more till I get to studio in bumper to bumper traffic I get a flat tire. Like the tire has literally pulled off the the rim and I'm stuck on the busiest freeway in Houston with my clock glaring back at me with only 50 minutes before I'm suppose to go live on Great Day. 

OH MY WORD!!!!

I went into determined mode. Called my dad asked him to meet me, called my girl Erin at Great Day and decided to move me at end of the hour and then called rescue 911 better know as "AT&T roadside assistance" to come scoop me up. And Hallalujah I wasn't even shaken...now that is real peace. 20 minutes later a tow truck arrives, 15 minutes later we are at a gas station to change tire and switch cars with my dad.

Its about 9:10am (show has started) I get on the road with a quick grab of my goods, adding of lipstick, fluffing of hair and a determined mind in tow. I arrive at the studio by 9:20am greeted with big hugs and lots of smiles. I made it with 20 minutes till I went on air and brought the below DIY segment. WOW! God is good and my dad is a superhero. Thanks dad. 

Long story short below is my Peace, Love and Boho segment on GREAT DAY HOUSTON. 

If the video is not working clink on link below. 

PEACE, LOVE AND BOHO SEGMENT

STEPS TO MAKING A CAFTAN, THE NEW LOVE OF YOUR LIFE.

3ways.jpg
supplies.jpg
  • 3 yards of your favorite fabric or 1 1/2 yards of fabric cutting it in half lengthwise and sewing ends together for one long piece.
  • ruler
  • scissors
  • chalk
  • fabric fuse or a sewing machine
yes. those steps.

yes. those steps.

  • from top folded corner measure 4" across mark with chalk and 2" down mark with chalk
  • use ruler to draw a line with chalk connecting marks
  • cut line
step2.jpg
  • unfold fabric showing rounded neckline
  • cut 1/2" slits at top of inner shoulder hems
  • find the center of front of fabric and measure 2-3" down and cut a slit
  • fold in triangular pieces and pin in place
  • on back side make four 2" slits across neckline, fold in and add pins to secure
  • for those that sew its time to take pins out and sew neckline into place; for non-sew people add fabric fuse in small pieces, press down hard to make sure that fabric is secure
  • Measure 13" from top of Caftan and mark (both sides)
  • Measure 14" from bottom of Caftan and mark (both sides)
  • Sew or add fabric use from mark to mark

And wham, bam, thank you mam this caftan has stolen my heart. This fabric was actually a piece I found at my grandma's house years ago. L-O-V-E!

Below is the caftan I made last night at 1am for Great Day. To make me not look like a heifer on TV (it adds 10lbs and all) I made a belt. See below pics on how I made it work with caftan. :)

I pulled belt through arm holes and tied on the inside. 

I pulled belt through arm holes and tied on the inside. 

So the morale of this story is no matter what wrench is thrown in your day, year or life, determine your outcome before you make a move. My day ended with a great segment, another glorious caftan, a smile, loving on friends and this post all because I was determined. Attitude is everything.  #happygirl 

Peace and love to you all, 

kjoy

turning old things to things you love.

thingsyouloveheader.jpg

Trends come and go but DIYs are forever. They're a great way for you to take ownership of your creativity without breaking your piggy bank.

My latest segment shows you a plethora of  eclectic decor that adds function to your room and never dropping the ball on awesomeness. YEAH BUDDY!

If video isn't working click on link below.

OLD THINGS INTO THINGS YOU LOVE SEGMENT

For a Livingroom

  • Using an old bench as a coffee table is a problem solver for small spaces and it just looks rad. Thanks to its narrow design it aligns perfectly next to a couch and if you lack in seating for company well you can bring back its original intent. 
This summer I got to help my friend move into her new home in Colorado and one tip was using this old bench as a coffee table and WE LOVE IT!

This summer I got to help my friend move into her new home in Colorado and one tip was using this old bench as a coffee table and WE LOVE IT!

  • I love the look of old barn ladders, thinking about the purpose and age behind gives even more weight to that love. Using them to hang your blankets doesn't just save space but its a quirky eye catcher in a room. If you can't find one make one. Easy breezy. 
  • I've always had a warm fuzzy spot for lighboxes and because I couldn't afford the real ones I made one up. Click on link of past blog that shows how to make this look for less than 10 bucks! (Insert large outdoor lights for christmas ones and fabric for paper) LIGHTBOX BLOG HERE
lighthouseandladder.jpg

For a Bedroom

  • Repurposing a large rug in a small bedroom is an inexpensive way to add flooring and a starting point in creating a fabulous room. 
  • Shutters don't only belong around windows but when you repurpose them as a headboard...BAM!!! instant bedroom love.

CHECK OUT MY BRITISH COLONIAL BLOG where I used a 8x10 rug to jazz up a boring 10x10 square space also known as a bedroom. 

  • The older i get the smaller my bedroom feels so to add space I put in floating shelves to hug the wall and give me room.
bedroomshelf.jpg


For a kitchen

  •  For years I've had island envy and i'm not talking in a tropical kind of way. I love the concept of an island in a kitchen, the storage, the counter space, the freedom oh my! And I solved my envy issues, taking an old dresser adding a wood block, piece of stone to size or cutting boards to DIY a funky functioning island. CHECK CHECK CHECK!
island.jpg
meandisland.jpg
  • How many people miss last years calendar? me too. So i repurposed them by adding a mat and framing it out. Tip: You can use different frames to create a cohesive theme but eclectic look or grab all the same frames and mats and  line them up and creating a nice art wall. 
JUST THINK OF ALL THE POTENTIAL THAT CAN HAPPEN HERE!!!! ENDLESS!!!

JUST THINK OF ALL THE POTENTIAL THAT CAN HAPPEN HERE!!!! ENDLESS!!!

  • Bookshelves are great for readers but they're also great to repurpose as a wine bar or coffee station. Keeping it organized by keeping it all together. 
bar.jpg

Necessity is the mother of invention. Never forget that...when you have a need you will go beyond what you have to get what you need.  This is my principal in design. 

I hope your creativity is spinning and you rekindle a new love for those old things.

xoxo, 

kjoy

Repurposing is best when you can think outside the box. Don’t look at something with eyes for what it was designed to do but rather look at it with eyes for what it has potential to be.
— kjoy

Jewelry. Organized. Whew.

When I’m giving someone a tip on organizing jewelry, I tell them this: If you don’t see it, you probably won’t wear it.

Is your jewelry driving you bonkers and you have no where to put it? Check out my latest segment with the lovely Rebecca Spera on this weeks Mirror Mirror for helpful creative tips to fix the crazy. xo 

organize your jewelry.jpg
I mean if it looks pretty when you buy it and wear it why not showcase it. Makes sense to me.

You've got this!

So much love...

xo kjoy

Debt Free and Fashion Forward

Rebecca and I rocking out the segment.

Rebecca and I rocking out the segment.

Many of us are tired of being in debt, myself included, my latest segment on Mirror Mirror will show you two ways to DIY a rad reminder that you are on your way out of debt or have recently become debt free. If you're either of those two case scenarios here's a big WOOHOO! HIGH FIVE!!! for you.

Click on link below to watch my latest segment on Mirror Mirror with the lovely Rebecca Spera who's rockin the PennyFight necklace from The Penny Series available HERE.  Major love and thanks to Rebecca and Sabrina for supporting and loving the Penny Series. xoxo

----->DEBT FREE AND FASHION FORWARD SEGMENT <-----

Below is a visual guide on how to DIY and rock your nameplate credit card necklace.

And here is easy steps to make that Debt Free bracelet. Remember its all about owning it. 

Here's what you need:

  • Credit cards or hotel keys
  • Scissors
  • Hole punch (3-hole is best)
  • Jump rings
  • Jewelry clasp

Cut your credit cards into strips one large one for faceplate. Punch one hole in the end of each small strip and four holes in the corners of the larger piece, remember using that 3hole punch will save your sanity and strength. Connect all of your credit card strips with jump rings to form a bracelet and add the clasp to make it all come together.

The biggest goal here is to not only DIY with a fun craft but to awesome move steps to empowering you. Debt is not and will not be your friend. I'm still in the works to defriend her on all levels but working towards something is better than avoidance. (if you haven't read last blog Let me take you to JunkyTown this would be the time.. heads up its deep :) would love to hear your feedback. 

3 cheers to all you debt-free achievers and "wannabe"rs... Hip Hip Hooray! Hip Hip Hooray! Hip Hip HOORAY!!!

So much love and excitement for debt free living, 

Kjoy

It's a Great Day for DIYs

Woke up with crafty projects on my mind and as luck would have it you get to journey with me as I show all the goods on Great Day Houston this morning. 

CLICK HERE FOR GREAT DAY SEGMENT OR WATCH CLIP BELOW


Duck Taping It


  • Pull tape the entire length to the belt buckle so the majority of the belt will be wrapped with one consistent piece of tape. 
  • Lay belt on top with the front side down toward sticky part of tape. 
  • Next tear tape into custom pieces to fill remainder empty spots. 
  • Use an ice pick or large needle to puncture hole in tape after you wrap belt. 
  • * punch hole from the front to back so the tap will go inward to back of belt. 


T-Shirt Time 


  • Take an old t-shirt fold into half and then half again. 
  • Cut 1' strips (that look like a big ole loop) stretch it out like you are shooting an arrow. 
  • Then wrap around your hand 4x to create circles. 
  • Make at least 14 circles. 
  • Take two circles and tie them with an extra small strip of fabric. 
  • Continue to you have attached all circles, on the last circle attach it to the first circle you started with. And Voila' you have a rad scarf perfect pairing with an awesome outfit. 


Re-purposing a Bill Cosby dad sweater


I was bummed when I realized I didn't have an old dad sweater but then I thought I love thrift shopping, i'm sure to find the perfect sweater at the goodwill for cheap and there it was... my Bill Cosby looking sweater. SCORE!!!! I got it and one more sweater to create a fabulous looking sweater vest for the fall. And this is how to achieve it...

  • Grab your sweater and spread it flat on a table.
  • Create a pattern on top with a thick marker, draw across the collar, along the armpits, down the side and across the bottom.
  • Grab your (sharp) scissors and start cutting along your pattern
  • When you're finished, it's all about how you put it on -- put both arms through the circle and let it fall like a vest!

*to create a longer vest get a bigger size sweater than you normally would wear. to do a cute cropped vest cut try using a larger sized kid sweater. Thrift stores are perfect for this DIY one you can find tons and too they're cheap without the emotional attachment so if you mess up no biggie. 

Click here for my mirror mirror segment where I do the same technique with a t-shirt! 


Chain Weaver


  • Grab that old chain that you never use anymore and spruce it up with colorful thread.
  • Take at least three to four pieces of thread and gather evenly on one end and tie a knot with them 1/3 from the bottom of chain.
  • Begin twisting or braiding thread through loops.
  • When equal on other side, cut and tie off. 

Cuteness just happened, you're welcome.

*Taping ends of threads together will help you weave through the chains a lot quicker after you knot it off at one end.


Paperclip Dangles 


  • Grab a paperclip and shape into a triangle or any shape you like. Its sturdy enough to manipulate to a shape you desire. 
  • Next apply glue on paperclip this will allow the thread to stay in one place and not slip around. 
  • Tie off end of threads (I would have at least 3 strands to help process go faster.) 
  • Wrap the outer edge of triangle and then go across to create a solid space. You could also to random zig zags across triangle to shake things up. Don't limit yourself to one color mix it up and make it yours. 

*adding adhesive dots in places that seem to be unraveling will help clean it up, not get messy and after you can cover with thread.


Had a great time with Debra as always!


Until next time...

kjoy

PS if possible I'd love your thoughts and comments. :) xo

I'll put a Hex Nut on You.

I love trending jewelry but dear lord it can be crazy expensive. Check out my latest Mirror Mirror segment where I turn hardware hex nuts into crazy awesome jewelry. I promise it won't disappoint!

>>> HEX NUT JEWELRY...YES PLEASE <<<

Hex it Up

  • Create your design with any color of hex nuts. You can paint them to change it up with nail polish.
  • Glue the sides of your hex nuts together into the shape you want. I totally love E3600 glue, it allows you to mold design but it also works to keep pieces of metal together. Let it dry.
  • Attach a large jump ring to sides of your design and attach a chain to the jump rings. The length of chain depends on if you are making a necklace or bracelet. Attach a clasp and you got yourself a fancy pancy piece of jewelry. 

To Braid or not to Braid That is the Question.

  • Cut three very long pieces of twine, thin rope, or thick string and tie it off and wrap with tape so it doesn't unravel when you start to braid.
  • Before you start to braid attach the end of strings to a pillow or tablecloth to stabilize it. Now let the braiding begin.
  • Braid the strings half-way down.
  • Lace one hex nut on center string then cross over like you would braid regularly then lace another hex nut on the center and cross over. Keep adding until you desired length. I did 16 nuts on my bracelets.
  • Continue to braid without nuts and tie off at the end.
  • Cut off any frayed strings from ends and put that bad boy on and work it. :)

I love finding things and repurposing them into something awesome.  Hardware is not just for boys, just sayin'. 

Stay awesome because you are awesome. 

kjoy

link chain washer love

Ok I'm in love with these chain gang layering necklaces...perfect pairing for any outfit. Watch my latest segment by clicking on link below. You'll see how easy it is to throw down and look freaking awesome. Side note the flower necklace DIY would be a perfect craft for any little lovebug girls in your life...next time I see my Maddie Joy (my 5 yr old niece) it going to be a DIY par-tay. :)

>>>Link Chain Layering Necklace Segment<<<


LINKS AND CHAINS NECKLACE
the finished look


  • 1 large washer
  • 8 medium washers
  • 8 small washers
  • Jump Rings
  • Jewelry Pliers
  • Necklace Clasp (optional)

small medium large washers
  • Grab a large washer-open a jump ring-attach it to the washer- then lock it up.
  • Grab the smallest washer-open jump ring-attach smaller washer-link small washer to the jump ring on the large washer you just locked up.
  • Do the same with medium washer- repeat pattern until you get four small and four medium washers on the largest washer.
  • And the pattern goes... Jump ring - jump ring - small washer - jump ring - jump ring - medium washer - jump ring - jump ring - small washer.
  • Repeat steps on the other side of largest washer.
  • When you are done with all the meticulous steps...whew! Attach chain (any length you choose) with jump rings to create your fantastic looking layering necklace.
Happy linking.

kjoy

Hardware Gone Awesome

This DIY has to be my absolute favorite...seriously. I wear these gems almost everyday and the best part about it, its so easy to make. Check out my latest mirror mirror segment via the link below.

  • cut two three-inch pieces of chains possibly shorter if you have thinner wrist. lucky you. :)
  • attach the end of chain to the side of one hinge using one jump ring and attach the other end of that chain to the other side of hinge. Repeat on other side.
  • in the center of the chain on one side, attach a jump ring to the center link, repeat on other side.
  • on one end attach your clasp to the jump ring.
  • now you are ready to clasp and go. 

Chevron L-bracket Necklace

  • grab your brackets and determine length of chain between both. make sure they are the exact same in length on both sides so it doesn't go lopsided on you. 
  • connecting the brackets to chain using jump rings.
  • attach a jump ring to the end of the chain and attach the top bracket, repeat on other side.
  • cut chain at the center and attach a jump ring to each cut side of the chain.
  • attach a clasp to one of the sides and you're done and doner!

For less than 5 bucks and in 5 minutes to make, I call that a totally win! 

Kjoy

Ps i would love to hear your feedback! xo

Leather Love and Polka Dot DIY

You know that old sweater you're yawning over or how about those also pants that are looking rather dull??? are you thinking of throwing them out well hold your horses and check out link below to resuscitate your dead wardrobe back to life back to reality! 


Click on the link below for my latest Mirror Mirror segment, we'll repurpose and spruce up those almost Salvation Army worthy pieces.

>>>LEATHER LOVE AND POLKA DOT DIYS<<<


Leather it up! 

What you're going to bring to the Leather DIY party:

  • An old cardigan or t-shirt
  • Faux leather fabric for the cheap route, real leather if you bringing your big guns. If you get an eighth of a yard on sale its like a buck and you only use a wee bit...so cheap.
  • Scissors
  • Thick Needle (i love working with thick needles because the eye of it is so easy to thread)
  • Upholstery Thread- you can either match thread to the fabric or use some funky cool colored thread to add interesting detail.
garment in need of love

supplies: faux leather, thread, large needle and scissors

you don't have to stick to threads that match the leather, branch out with color to add funk and interesting detail

How to:
  • Cut the appropriate size and shape of leather depending on what you are going to leather up. ie elbow patches, shoulder patches, pocket squares, ect.
  • Thread your needle and tie a knot in the end.
  • Start sewing your fabric onto your old clothing piece. Start on the inside of the clothing item. If you are covering a pocket work in a U shape.
  • After you're finished sewing, tie off the thread on the inside of the garment.
stitching doesn't have to perfect its like a monet, up close its a mess but from a distance its beautiful

finished look is too cute


Do the Polka!

What you're going to bring to the Polka dot DIY party:
  • Old pair of pants in any color, shape or size. (or another article of clothing)
  • Fabric "Paint" Pens 
  • Ruler
supplies: old pants, ruler and a fabric paint pen

this is what the pens and paint look like...you're welcome. 

How to:
  • Lay your pants or clothing item on a flat surface and smooth out the wrinkles.
  • Lay your ruler across the garment where you'd like your dots to be. 
  • Make dots an inch apart all the way across, this is going to be your starter line that you will use to make the dots consistent throughout the garment.
  • Move the yard stick down about an inch and make dots and inch apart again, BUT this time make sure the new dots are IN BETWEEN the dot you just made. Its super duper simple. You got this!
  • Finish the front and let it dry and then do the same steps to the back side.
    finished look i've seen everywhere...the gap, khols, nordstrom oh yeah
Now aren't you glad you did give the ole heave ho to those dulled down pieces? I mean you wouldn't have gotten the chance to work that leather & polka dance those pants off!

Happy DIYing.

kjoy

shrinky dink a dink


Does this look familiar?


I don't know about you but growing up i LOVED shrinky dinks and easy bake ovens and when i got a chance to revisit my childhood I seized my opportunity. 


Check out my latest segment on Livewell Network's Mirror Mirror where I showed Rebecca Spera how to bring back your childhood while getting crafty and being green. (as in re-purposing your throw-aways) 

>>>>Here's the link to the Shrinky Dink Jewelry On Mirror Mirror<<<<


Shrinky Dink bracelets 

Supplies

#6 Plastic Takeout Containers
Permanent Markers
Scissors
Jump Rings
Bracelet Clasp
Hole Punch
Fingernail Clippers
Small Needle-Nose Pliers (Optional)


Make sure you have a recycled #6 plastic container. Cut the flat part out of your to-go container.

Color a pattern or scribbles with your markers onto the plastic container.

There are so many different colors with permanent markers so its easy to get creative!

Cut large circles (for earrings) or squares/rectangles (for bracelets/necklaces) out of the plastic. Use nail clippers to round the corners of your pieces. 
Arrange pieces on a parchment paper lined baking sheet. 
Pop in the oven for about 30 seconds to one minute on 350-degrees. Watch them until they shrink up and lay back down flat. 
Let the pieces cool. Use jump rings to connect the pieces to make your jewelry! 

Bubble Wrap Bracelet


I didn't take pics of the bubble wrap bracelet but you can always follow along the segment and/or the step-by-step instructions below.

Supplies:

Bubble Wrap
Scissors
Parchment Paper
Pen/Pencil
Pearls for jewelry (with holes punched)
Circle Pattern (optional)
An Iron
Jewelry Supplies (bracelet chain, necklace chain, jump rings, clasps)

How to:

Preheat iron on wool setting, no steam (dry).
Cut bubble wrap into eight large equal pieces.
Layer two pieces of bubble wrap on top of each other, inside two pieces of parchment paper (or folded piece).
Iron both sides of the parchment paper until the bubble wrap melts together into a thin sheet.
Put two more pieces of bubble wrap around the piece you just ironed, put back in between the parchment paper and iron on both sides again.
Repeat with the rest of your bubble wrap (two more times).
Cut circles out of the flattened bubble wrap sheet.
Punch holes at the top of each piece with a thick needle.
Attach pearls and bubble wrap charms to your bracelet or necklace in any pattern you choose!


Thanks Rebecca and Sabrina for another great segment!


That's a wrap!!!

kjoy

Lightboxes

I love lightboxes. I wish i could have them for every occasion and in every room. They remind me of the carnivals I never went to growing up. To me they convey whimsy and warmth.


When my dear friend Brandi Lisenbe asked me to inspire bloggers for the Houston Blogger Symposium Holiday party, I thought what a great opportunity to build my own lightbox.

So here I am sharing my lightbox love...

  • First get a foam board and cut to size of whatever you are going to frame it out with, I cut mine to fit this awesome antique frame. Also, I have found that foam boards run between $4-6 at most places but if you hit up the Dollar store you can score by paying only....you guessed it $1.00. 


  • Next you want to wrap your board in wrapping paper, I choose a gold foil for the holidays. Then write out what you are wanting to display. My personal choice was Kristenjoy.com but the options are endless...Congrats, Happy Birthday, Merry Christmas...you get the drift. I added circles within the letters where I would wanted to see the lights shine through.  


  • Grab a handy dandy ice pick and poke holes where you put those conveniently placed circles within the letters.


  •  Now it's time to flip over your board and start pushing through Christmas lights wherever you see a hole.


  • From the back it might look like a hot mess but when you turn it around its a masterpiece in the making. Kristenjoy.com took 200 lights, which means you will probably use tons of lights depending on how long your words are, so choose wisely. 


  • Flip it back around and place it in your frame of choice and Wham-o Bam-o a personalized lightbox!


Let there be light!


I couldn't just do one, could I?!


I absolutely love it and I'm sure all you fellow friends out there will be seeing one of these gems at my next party. 


So lets Party, Karamu, Fiesta, forever...All Night Long!

kjoy


T-Shirt Time

Who doesn't have an old t-shirt that they either neglect or are thinking about tossing... 
                                                                                                                   ...We all do. 
So instead of forgoing them any longer how about re-purposing them . 

Check out my latest segment on Mirror Mirror with the ever so lovely Ms. Rebecca Speara. 

---> Click Here To Watch My DIY Re-Purposing T-Shirts on Mirror Mirror <---


Rebecca and I about to tackle 5 ways to re-purpose a T-shirt.

VEST
  • Spread an old t-shirt flat on a table
  • To create a pattern on top with a thick marker, draw across the collar, along the armpits, down the side and across the bottom
  • Grab your (sharp) scissors and start cutting along your pattern
  • When you're finished, it's all about how you put it on -- put both arms through the circle and let it fall like a vest!


RACERBACK
  • Lay your t-shirt flat on a table
  • Grab a marker and create a one-inch border around the collar, pressing hard with your marker so it bleeds through to the other side
  • Draw another dotted line about one inch from the bottom hem of the shirt
  • Then draw another dotted line about an inch above that line
  • Flip the shirt over and follow the same pattern on the sleeves
  • Create a V along the neckline
  • Cut out your pattern
  • To make the racerback part, take the extra piece that you cut from the bottom and stretch it out
  • Cut it open to make one long strip
  • Gather the sleeves about two inches from the top and knot the strip around the sleeves
  • Then wrap the strip around and around, pulling tight and knotting it at the end


ACCESSORIES
  • Fold a t-shirt in half, then quarters, then eighths
  • Cut one inch wide strips
  • Snip the pieces into long strips and pull to stretch out
  • Next, do a five strand braid...
  • Gather the ends of five stands together, knot them, and lay the strands out straight on the table
  • Starting at the right, take the end stand and cross it over the one next to it
  • Then take the middle strand and cross it over the one next to it in the same direction
  • Take the leftover stand and cross it over the stand next to it heading back in the other direction
  • Keep crossing the strands the same way, back and forth
  • Knot both ends and make a bracelet or necklace or headband!

 WATERMARK
  •  Grab an old t-shirt and lay it flat. 
  • Write out lyrics, poems or favorite quotes with Elmer's Gel Glue.
  • Allow the glue to completely dry, may take 45 min. 
  • Create your dye bath, instructions are HERE
  • Dunk shirt in for 5-15 min. in dye bath depending on desired. Make sure to wear gloves so your pretty nails do not find themselves dyed. 
  • Remove shirt from bath and let it dry. 
  • Wash in cold water and dry normally.


BLEACH OUT
  • Create your pattern and draw on contact paper, sticky side down.
  • Razor cut your image on contact paper.
  • Take your dark t-shirt and lay it flat.
  • Make sure to put a thick piece of cardboard imbetween shirt. 
  • Peel off back side paper from contact sheet and place sticky side down on t-shirt. 
  • Scrub Clorax Bleach Pen over pattern. 
  • Allow bleach to completely dry. 
  • Peel of contact paper.
  • Wash in cold water seperately and dry normally.
  • Enjoy your cute "T'.
  •  Behind the scenes with Rebecca where great memories were made.
    Trying something new and getting creative empowers you on so many levels. So grab your favorite friends, a bottle of wine, a great music playlist and have a ball empowering your creativity.
     Get crackin'
    kjoy
    Ps Big thanks to Rebecca and the Mirror Mirror crew! 

Making Memories with Ornaments!


Watch Sibila Vargas from Fox talk with me about Christmas traditions!


Now before each segment, I like to test out my ideas and crafts on the family. Here is Uncle Matt (my handsome bro) with our nephew Carson making ornaments of his little hand using glitter, paint, felt and more. Aprons are definitely neccessary!!!


I pulled a lot of these craft items from my mom's place and after squeezing that paint so hard my face turned red, I guess it's safe to say the paint quite possibly could be as old as I am!!

Share with me some of the fun crafty stuff you and your family do together around the table during the holidays! I'm all ears!
happy birthday jesus! boom.
kjoy